Community@UAF WordPress uses the block editor.
How do I log in?
- Go to your class website
- Look for a Login or Dashboard link and click on it. If there is no link, you can add ‘wp-admin/’ to the end of the URL. For example, if your class is located at https://math403x.community.uaf.edu/ change it in the address bar to https://math403x.community.uaf.edu/wp-admin/ – if there is no link, please alert your instructor!
- Use your UA login credentials (same as you use for Blackboard and UA Google Apps) on this screen:
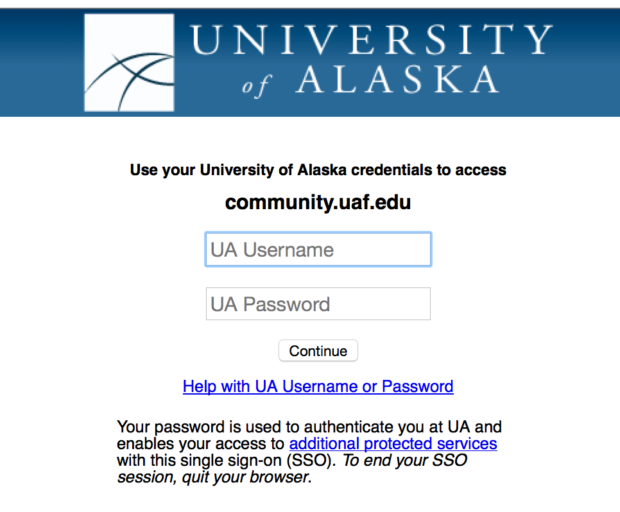
- Once you are logged in, you will be put into the ‘Dashboard’ of your course website. Learn how to use Dashboard here.
Watch a tutorial on how to log in:
I can't remember my UA login credentials
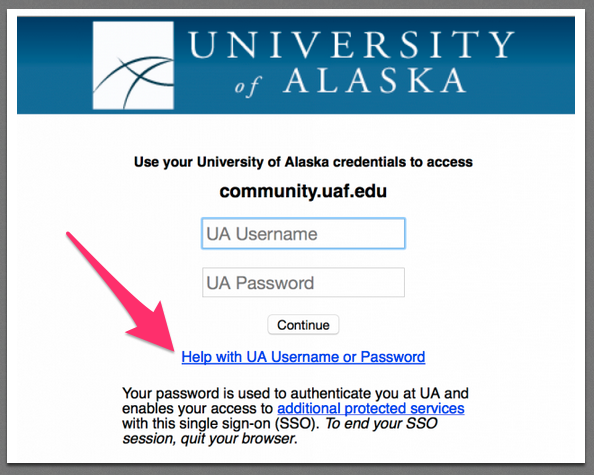
- Click on the link ‘Help with UA Username or Password’ on the login screen and follow instructions
- And/Or Contact the OIT Helpdesk
I can't remember the address of my class website
Login to Community and then click on the ‘My Sites’ link at the top left, you will find all the course websites you are a member of. Or, please read the syllabus, which should be located inside the Blackboard course shell. Contact your instructor directly by phone or email for instructions.
Is this the same as WordPress.com?
No, it is not the same but it is similar. Your instructor may require that you use WordPress.com to set up your own personal blog site. WordPress.com is similar to this Community WordPress but it is a commercial product not associated with UAF. You can find their tutorials here.
USING WORDPRESS
How do I use the Dashboard
The Dashboard is the back-end of your website on community. This is where the content for the site, including your posts, is built.
From the Dashboard, you can:
- Create a new post
- Edit your posts
- Find your draft posts or ones that are already published
- Manage your profile
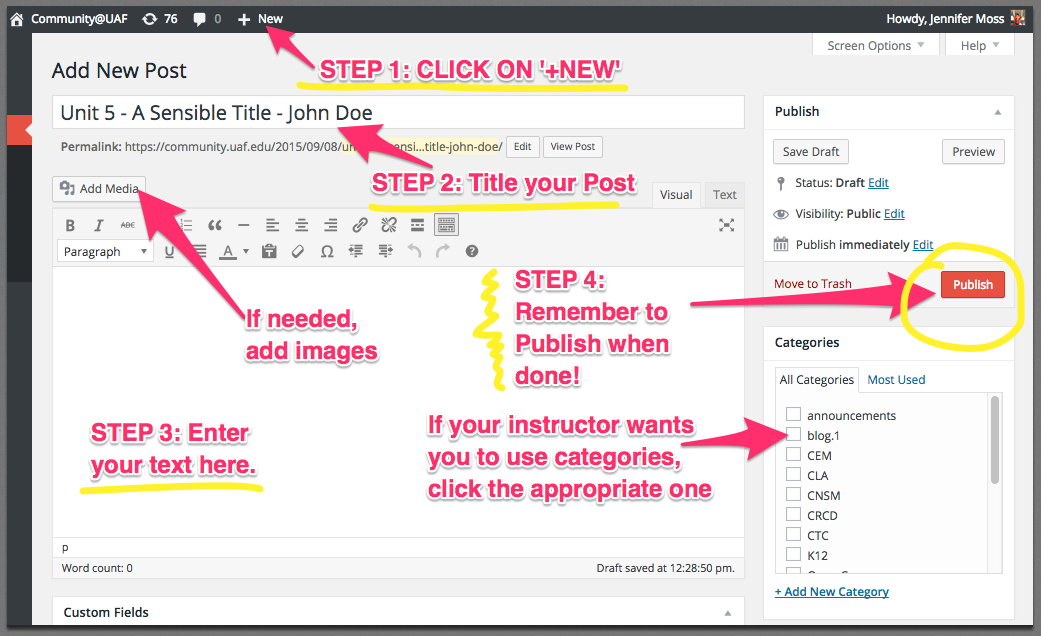
How do I make a Post?
How do I add an image in my post?
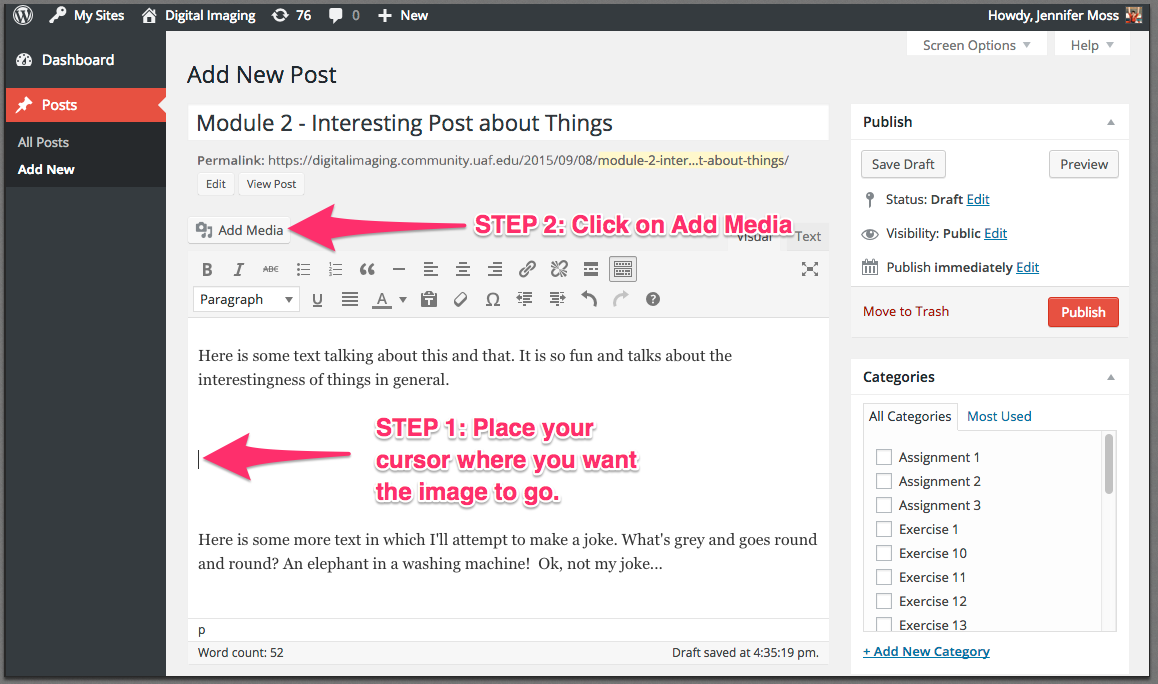
Login to your course site and create a new post. From within the post, put your cursor where you want the image to appear. Click on “Add Media.”
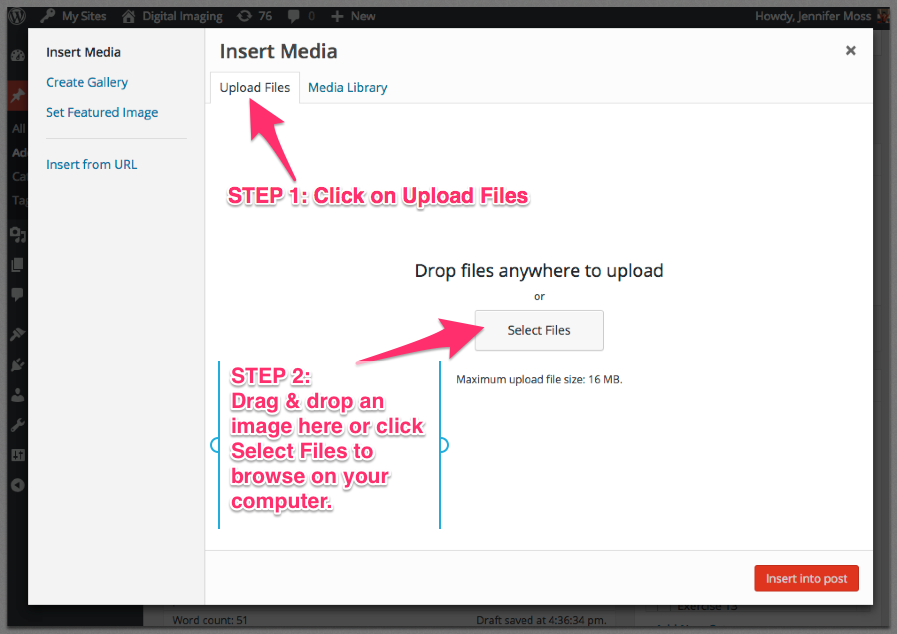
In the new window, Select the “Upload Files” tab and then “Select Files” to select an image from your personal hard drive.
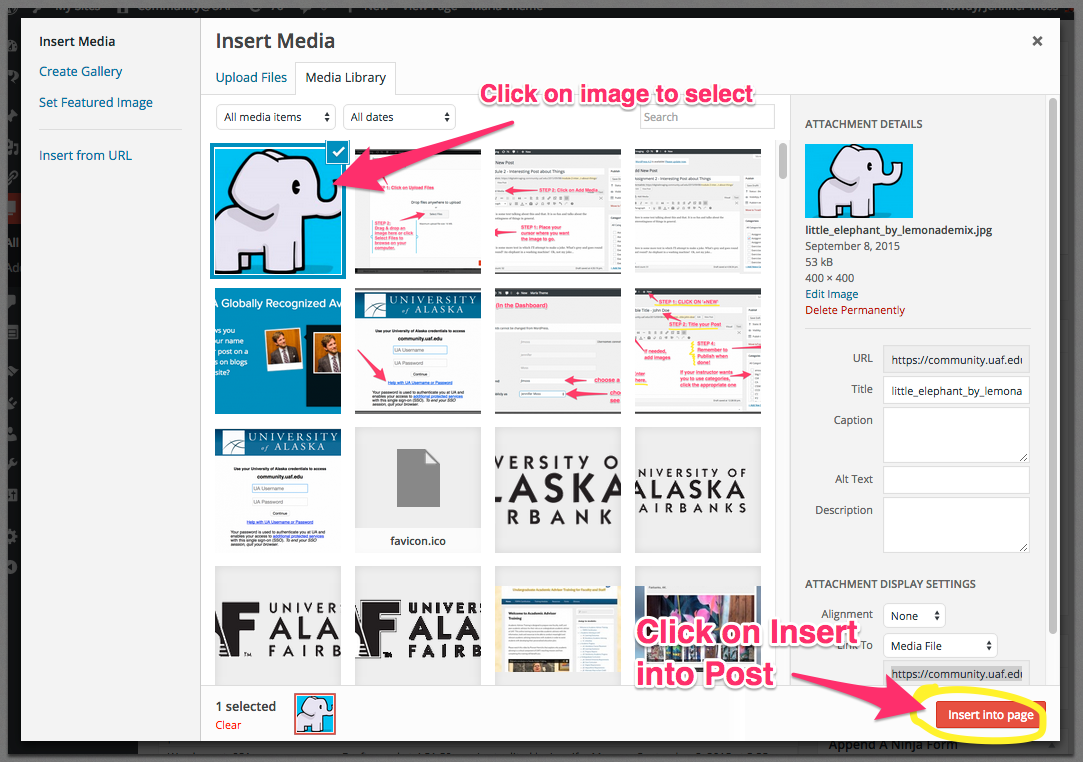
Browse on your hard drive until you find the image. Select the image and click “Open.”
Your image will be added to the Media Library in your course site. With the image selected click on “Insert into Post.”
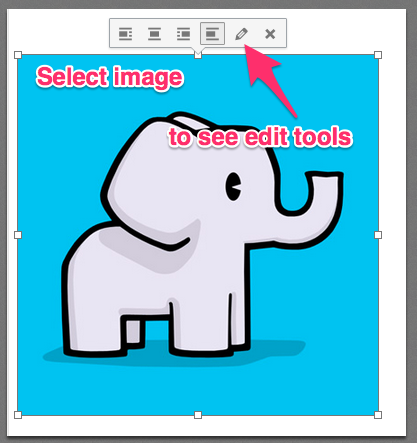
Once the image is in your post, to make edits, select the image and make a selection from the popup window. The first four icons set the layout, the “pencil” icon will give you edit options, and the “x” icon will remove the image from your post (but not the library).
How do I add a video to my post?
To add video from YouTube or Vimeo, simply copy the URL and past it into your post where you want it to appear.
How do I format text on my post?
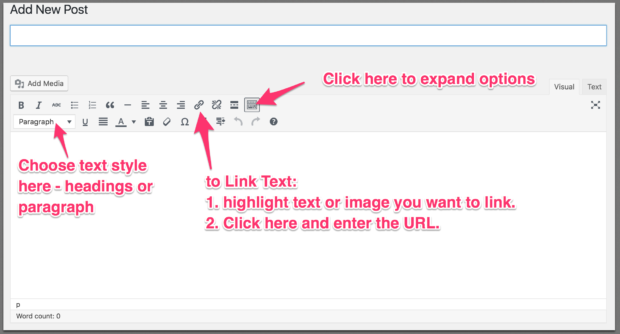
Format your text by using the options above the text area.
If you don’t see 2 lines of options, expand for more by clicking on the icon on the upper right:
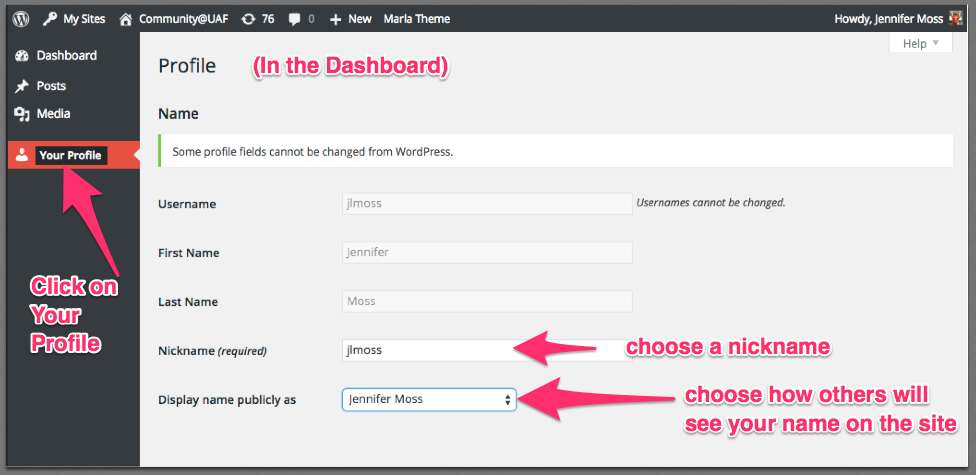
How do I change my display name
NOTE: Your Dashboard may look slightly different, however the procedure is the same.
Can I change my account photo?
Your instructor may have enabled a plugin that allows you to upload an image directly into your Profile section. If you don’t see that option, you can, alternately, use Gravatar — globally recognized avatars to personalize your posts.
Get your Gravatar by going to: https://en.gravatar.com/. You will need to sign up for an account. Once you have a Gravitar, your picture will appear next to your posts and comments on both Community and all WordPress blogs!
Need help with Gravatar? Visit their Support Page.

Help! I still have questions!
If we haven’t answered your question here, please contact us.
If you are having trouble with a course site, make sure to contact your instructor first to let them know what is happening.
